blue snowball microphone manual
Summary
Discover the ultimate guide for your Blue Snowball Microphone. Learn easy setup, troubleshooting, and optimization tips to enhance your recording experience.

The Blue Snowball is a top-selling USB condenser microphone known for its unique design and professional audio quality, perfect for podcasting, voiceovers, and music recording.
1.1 Overview of the Blue Snowball Microphone
The Blue Snowball is a popular USB condenser microphone renowned for its unique design and professional-grade audio quality. Designed for versatility, it excels in podcasting, voiceovers, and music recording. Its proprietary condenser capsule ensures crisp, detailed sound capture. Plug-and-play functionality makes it easy to use with computers, and it comes with a desktop tripod stand for stable placement. The Snowball’s compact, stylish design and high-quality performance make it a top choice for both beginners and professionals seeking reliable audio solutions.
1.2 Key Features and Benefits
The Blue Snowball microphone offers multiple polar patterns, including cardioid and omnidirectional modes, allowing for flexible recording setups. Its condenser capsule delivers clear, high-quality audio with excellent frequency response. The plug-and-play functionality ensures easy connectivity to computers, while the included tripod stand provides stability. Weighing just 1.5 pounds, it’s lightweight and portable. These features make it ideal for capturing vocals, instruments, and podcasts, ensuring professional-grade sound in various recording environments with minimal setup required.

System Requirements for the Blue Snowball
The Blue Snowball is compatible with Windows, macOS, and Linux. It requires a USB 1.0 or higher port and an internet connection for driver installation and updates.
2.1 Compatible Operating Systems
The Blue Snowball microphone is compatible with Windows 10, 8, 7, and macOS 10.4.11 or later. It also supports Linux operating systems, ensuring versatile use across different platforms. The microphone is plug-and-play, with drivers typically installed automatically upon connection. For optimal performance, ensure your operating system is up-to-date. Compatibility across multiple OS versions makes the Snowball a flexible choice for various recording environments and software applications.
2.2 Minimum Hardware Specifications
The Blue Snowball requires a USB 1.0 or higher port and a computer with a 1 GHz or faster processor. It needs at least 512 MB of RAM and an available USB port for direct connection. The microphone is plug-and-play, with no additional drivers required beyond standard USB audio support provided by your operating system. Ensure your system meets these basic specifications for seamless operation and high-quality audio recording.
Unboxing and Accessories
Your Blue Snowball package includes the microphone, a desktop tripod stand, and a USB cable. Everything you need to start recording right out of the box.
3.1 What’s Included in the Box
The Blue Snowball package includes the microphone, a USB cable, and a desktop tripod stand. These components ensure a quick and easy setup for high-quality audio recording.
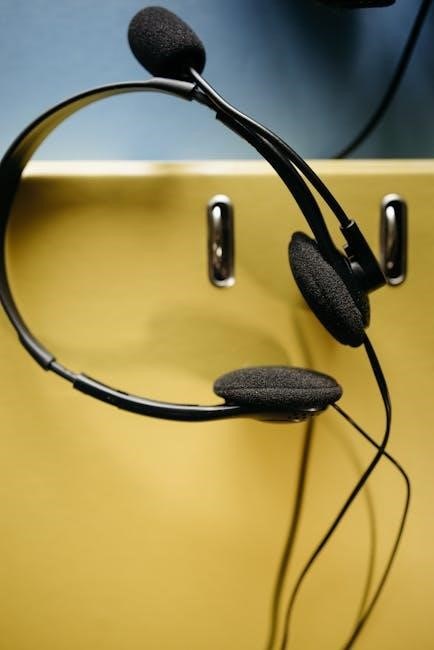
3.2 Understanding the Microphone Components
The Blue Snowball features a condenser capsule for clear sound capture. It includes a swivel mount for easy positioning and a USB connector for plug-and-play functionality, making it user-friendly and versatile for various recording needs.
Setting Up the Blue Snowball Microphone
The Blue Snowball is easy to set up: mount it on the tripod and connect it via USB for plug-and-play functionality.
4.1 Mounting the Microphone on the Tripod Stand
To mount the Blue Snowball, locate the swivel mount on the microphone’s bottom. Attach it securely to the tripod stand for stability. Ensure the connection is firm to prevent wobbling during use.
Position the microphone on a flat surface or adjust the stand for optimal height. This setup ensures proper alignment and minimizes vibrations, providing a professional recording experience from the start.
4.2 Connecting the Microphone to Your Computer
Plug the rectangular end of the USB cable into your computer’s USB port. The square end connects to the microphone. Ensure the connection is secure for proper functionality.
Your computer should automatically recognize the Blue Snowball. If not, restart your system or consult the troubleshooting section. Once connected, select the Blue Snowball as your input device in your recording software to begin capturing high-quality audio.
Choosing the Right Recording Environment
Optimize your space by minimizing background noise and echo. Position the Blue Snowball in a quiet room, away from walls, and use the included stand or boom arm.
5.1 Optimizing Your Room for Audio Quality
To achieve professional-grade recordings, find a quiet room with minimal background noise. Reduce echo by adding soft furnishings like carpets, curtains, or acoustic panels. Avoid placing the microphone near electrical devices to prevent interference. Position the Blue Snowball away from walls and corners to minimize sound reflections. Use the included tripod stand to elevate the microphone and ensure it’s stable. Keep the room at a comfortable temperature to prevent condensation. Close windows and doors to block external noise for clearer audio capture.
5;2 Positioning the Microphone for Best Results
Position the Blue Snowball 6-8 inches from your mouth for clear vocals. Use the tripod stand to elevate it to chest level, ensuring stability and optimal sound capture. Face the microphone towards your sound source, and adjust the pickup pattern based on your recording needs—cardioid for solo voices and omnidirectional for groups. Keep it away from walls and electrical devices to minimize interference and reflections, and experiment with placement to reduce background noise in noisy environments.
Using the Blue Snowball with Recording Software
The Blue Snowball seamlessly integrates with recording software like GarageBand and Audacity. Select the microphone in audio preferences, create a track, and adjust input levels for optimal clarity and sound quality.
6.1 Selecting the Blue Snowball in GarageBand
To use the Blue Snowball in GarageBand, open the app and go to Preferences > Audio. Select the Blue Snowball as the input device. Ensure the microphone is plugged in, as it will only appear in the list when connected. Create a new vocal track, and the Blue Snowball will be automatically selected as the input source. Adjust input levels if necessary for optimal recording quality.
6.2 Configuring the Microphone in Audacity
Open Audacity and go to Preferences > Devices. Select the Blue Snowball from the Recording Device dropdown. Ensure the microphone is plugged in before launching Audacity. In the Recording tab, check the Levels and adjust the input level to 30-80% for optimal sound. Position the microphone correctly, and use the Gain control if needed. Record a test clip to verify the setup and adjust levels to avoid distortion.
Troubleshooting Common Issues
Common problems include no sound, distortion, or low volume. Check settings, ensure proper connection, and verify microphone levels in your recording software or system preferences.
7.1 Resolving Connectivity Problems
If the Blue Snowball isn’t detected, ensure the USB cable is securely connected to both the microphone and your computer. Restart your system and check audio settings to select the Snowball as the default device. If issues persist, unplug the microphone, wait a few seconds, and reconnect it. Verify that no other USB devices are conflicting and that your operating system is up to date. Consult the manual or manufacturer support for further assistance.
7.2 Adjusting Input Levels for Optimal Sound
Ensure the Snowball is selected as the default microphone in your system settings. Open the audio control panel, adjust the volume level to 70-80% for clear sound. Avoid distortion by keeping levels below 90%. Position the mic 6-8 inches from your source, slightly off-center to reduce harsh tones. Test with audio playback and fine-tune levels for balanced recording. Proper adjustment ensures professional-grade audio quality and minimizes post-recording edits.
The Blue Snowball offers exceptional audio quality and versatility, making it ideal for podcasting, music, and voiceovers. Regularly clean the mic and store it safely to maintain performance and longevity.
8.1 Best Practices for Long-Term Use
Regularly clean the microphone grille with a soft cloth to maintain sound quality. Store the Snowball in a protective case when not in use. Avoid exposure to moisture and extreme temperatures. Handle the mic with care to prevent damage to the condenser capsule. Update your computer’s audio drivers periodically for optimal performance. Refer to the manual for troubleshooting tips to address any issues promptly and ensure longevity.
8.2 Exploring Advanced Recording Techniques
Experiment with microphone placement to achieve desired sound depth. Use pop filters to reduce plosives when recording vocals. Adjust input levels in software to optimize audio quality. Incorporate external filters or effects in post-production for enhanced clarity. Familiarize yourself with advanced features in recording software to refine your tracks. Explore stereo recording modes if available. For multitrack recording, ensure proper synchronization. Lastly, practice layering sounds to create rich and dynamic audio compositions.

Additional Resources
Access the official Blue Snowball manual, online tutorials, and community forums for troubleshooting and advanced techniques. Explore GarageBand and Audacity setup guides for optimized recording experiences.
9.1 Downloading the Official User Manual
The official Blue Snowball user manual is available for free online. Visit the Blue Microphones website or trusted sources like ManualsLib to download the PDF. This guide provides detailed setup instructions, troubleshooting tips, and advanced recording techniques. It also includes quick start guides for GarageBand and Audacity. Ensure you download the correct manual for your Snowball model to access specific features and optimizations. The manual is essential for unlocking the full potential of your microphone.Visit Blue Microphones for the latest version.
9.2 Finding Online Tutorials and Community Support
Blue Microphones offers extensive online resources, including tutorials and community forums. Visit their official website for video guides and FAQs. YouTube channels provide setup tips and recording techniques. Join forums like Reddit’s r/WeAreTheMusicMakers for user discussions and troubleshooting. These platforms help you master the Snowball’s features and resolve common issues. Explore community-driven content for optimized performance and creative recording ideas. Online support ensures you get the most out of your Blue Snowball microphone experience. Visit Blue Microphones or YouTube for more resources.