pax plus manual
Summary
Need help with your PAX Plus? Find easy-to-understand manuals & troubleshooting tips right here! Get the most out of your device with Sarasota CCW.
PAX Plus Manual: A Comprehensive Guide (Updated 04/15/2026)
Today’s date is 04/15/2026․ This manual details the PAX Plus, a trusted cannabis technology device, covering setup, usage, and advanced features for optimal performance․
Welcome to the world of PAX! The PAX Plus represents a significant evolution in portable cannabis consumption, blending sleek aesthetics with powerful technology․ Whether you’re a seasoned enthusiast or new to vaporizing, this device offers a versatile experience for both dry herb and concentrates․
PAX has established itself as a leader in cannabis innovation, and the Plus builds upon that legacy․ This manual provides a comprehensive guide, ensuring you unlock the full potential of your PAX Plus․ From initial setup to advanced customization, we’ll cover everything you need to know for a satisfying and discreet experience․
What is the PAX Plus and its Purpose?
The PAX Plus is a sophisticated, portable vaporizer designed for both dry herb and concentrates, offering a discreet and efficient consumption method․ Its primary purpose is to provide a flavorful and controlled vapor experience, differing from traditional combustion․
PAX prioritizes “flower-first” innovation, meaning the Plus excels with dry herb while still accommodating concentrates with a separate pod․ The device’s sleek design and intuitive controls make it user-friendly, while advanced features cater to experienced users seeking customization and precision․
Key Features of the PAX Plus
The PAX Plus boasts several key features enhancing the user experience․ These include precise temperature control, allowing customization for optimal vapor quality with both dry herb and concentrates․ Stealth Mode ensures discreet operation, while a long-lasting battery provides extended use․
Remote control via the PAX Mobile App enables convenient adjustments and monitoring․ Its sleek design and durable construction contribute to its premium feel․ The device supports both session and on-demand vaporizing styles, offering versatility․

Setting Up Your PAX Plus
Proper setup is crucial for optimal performance․ This section guides you through unboxing, charging, and connecting your PAX Plus to the mobile application seamlessly․
Unboxing and Initial Inspection
Carefully unpack your PAX Plus and verify all components are present․ The box should contain the device itself, a USB-C charging cable, and potentially additional oven lids or concentrate inserts depending on the kit․ Inspect the device for any visible damage incurred during shipping, such as dents or cracks․
Ensure the battery is not excessively hot or swollen․ Familiarize yourself with the device’s basic layout – the mouthpiece, chamber door, and multi-purpose button․ Retain the original packaging for potential warranty claims or returns․ A quick visual check ensures a positive user experience from the start․
Charging the PAX Plus: A Step-by-Step Guide
Locate the USB-C port on the bottom of your PAX Plus․ Connect the provided USB-C cable to the device and a powered USB source – a wall adapter or computer․ The device will illuminate with a pulsing light indicating it’s charging․
Allow approximately 2-3 hours for a full charge․ The light will change to solid when complete․ Avoid using fast chargers as they may damage the battery․ A fully charged PAX Plus provides ample session time․ Monitor the device’s LED indicator for charging status updates․
Downloading and Installing the PAX Mobile App
Visit the App Store (iOS) or Google Play Store (Android)․ Search for “PAX Mobile” and locate the official application developed by PAX Labs․ Download and install the app onto your smartphone or tablet․
Enable Bluetooth on your mobile device․ Open the PAX Mobile app and follow the on-screen prompts to create an account or log in․ The app allows remote control, customization of temperature profiles, and access to device settings for an enhanced user experience․
Using the PAX Plus for Dry Herb
Prepare your dry herb by grinding it to a medium consistency․ Carefully pack the chamber, ensuring not to overfill, for optimal vapor production and flavor․
Grinding and Packing the Chamber
Achieving the perfect grind is crucial for a smooth PAX Plus experience․ A medium consistency, similar to coarsely ground coffee, is ideal․ Avoid overly fine grinds, as they can clog the airflow, and overly coarse grinds, which may result in inefficient heating․
When packing the chamber, gently load the ground herb, avoiding compression․ A lightly packed chamber allows for better airflow and even heating․ Do not overfill; leave a small space at the top for vapor to circulate․ Experiment with different packing densities to find what works best for your herb and preferences․
Temperature Control and Settings
The PAX Plus offers precise temperature control via the device itself or the mobile app․ Lower temperatures (around 350°F/177°C) preserve flavor and terpenes, while higher temperatures (up to 420°F/216°C) maximize vapor production․
Experiment with different temperature settings to discover your ideal balance․ The app allows for customized temperature profiles, enabling you to create presets for various herb types․ Remember, different strains release their flavors and effects at varying temperatures, so exploration is key!
Optimizing Vapor Quality for Dry Herb
Achieving optimal vapor quality with the PAX Plus relies on proper grinding and packing․ A medium-fine grind ensures even heating, while avoiding overpacking allows for sufficient airflow․
Start with a moderately packed chamber and adjust based on your experience․ Lower temperatures are best for flavor, while higher temperatures yield denser vapor․ Regularly cleaning the chamber is crucial for maintaining consistent performance and preventing residue buildup that can affect taste․

Using the PAX Plus with Concentrates
The PAX Plus offers versatility with concentrates using a dedicated pod․ Proper preparation and temperature settings are key for a flavorful and efficient experience․
Preparing the Concentrate Pod
To begin using concentrates with your PAX Plus, ensure the concentrate pod is thoroughly cleaned before each use to maintain optimal flavor and prevent residue buildup․ Carefully load your desired concentrate into the pod, avoiding overfilling to ensure proper vaporization․ A small amount goes a long way! Gently press the concentrate down, but do not pack it tightly, as this can restrict airflow․
Securely attach the concentrate pod into the PAX Plus chamber․ Double-check that it’s firmly in place before initiating the heating process․ Remember, proper pod preparation is crucial for a smooth and enjoyable concentrate experience with your device․
Temperature Settings for Concentrates
When vaporizing concentrates with your PAX Plus, temperature control is paramount for achieving the desired flavor and potency․ Lower temperatures (around 500-600°F) generally preserve more delicate terpenes, resulting in a flavorful experience․ Higher temperatures (600-700°F) produce thicker vapor and more potent effects, but may sacrifice some nuanced flavors․
Experiment to find your sweet spot! The PAX Mobile App allows for precise temperature adjustments and custom profiles․ Start low and gradually increase the temperature until you reach your preferred balance of flavor and vapor density․
Cleaning and Maintenance After Concentrate Use
Concentrate use requires diligent cleaning of your PAX Plus․ Residue can quickly build up, impacting performance and flavor․ After each session, allow the device to cool completely․ Gently swab the chamber with a PAX cleaning wipe or isopropyl alcohol and a cotton swab․
Pay close attention to the concentrate pod․ Ensure it’s free of any remaining oil․ Regular cleaning prevents clogging and ensures optimal vapor production․ Avoid harsh abrasives that could damage the device․

PAX Plus Advanced Features
Explore stealth mode, remote app control, and customizable temperature profiles for a personalized experience․ These features enhance discretion and optimize your PAX Plus sessions․
Stealth Mode: Discreet Operation
The PAX Plus’s Stealth Mode prioritizes user discretion․ Activated through the mobile app, this feature significantly reduces the visible brightness of the device’s indicator lights during operation․ This minimizes attention, making it ideal for use in public or sensitive environments where subtlety is key․
Stealth Mode doesn’t impact performance; it solely alters the visual cues․ Users can seamlessly enjoy their session without drawing unwanted notice․ Remember to deactivate Stealth Mode when desired for standard visibility․
Remote Control via the Mobile App
The PAX Mobile App unlocks extensive remote control capabilities for your PAX Plus․ Beyond Stealth Mode, the app allows users to adjust temperature settings, monitor battery life, and customize temperature profiles—all without directly interacting with the device․ This provides convenient, hands-free operation and enhanced control․
Firmware updates are also managed through the app, ensuring your PAX Plus remains optimized․ Explore the app’s interface to discover the full range of features designed to elevate your vaping experience․
Customizing Temperature Profiles
The PAX Plus, paired with the Mobile App, offers personalized temperature profiles for both dry herb and concentrates․ Users can create and save custom heating curves tailored to their preferences, maximizing flavor and vapor production․ Experiment with different temperature settings to discover the ideal experience for various strains․
These profiles can be named and easily selected, providing a consistent and enjoyable session every time․ The app’s intuitive interface simplifies the customization process․
Troubleshooting Common Issues
This section addresses frequent PAX Plus problems, including power failures, vapor production issues, and error messages, offering solutions for a seamless experience․
PAX Plus Not Turning On
If your PAX Plus fails to power on, first ensure it has sufficient charge by connecting it to a power source for at least two hours․ A depleted battery is the most common cause․ If charging doesn’t resolve the issue, try a different USB cable and adapter to rule out a faulty connection․
Press and hold the device’s mouthpiece button for a full ten seconds to initiate a hard reset․ If the device still doesn’t respond, contact PAX support for further assistance, as internal hardware issues may be present․ Avoid disassembling the device yourself․
Poor Vapor Production
Experiencing weak vapor? Ensure your dry herb is properly ground to a medium consistency – not too fine, not too coarse – for optimal airflow․ Packing the chamber too tightly restricts air, while packing it loosely results in inefficient heating․
Experiment with different temperature settings; lower temperatures yield flavor, while higher temperatures maximize vapor․ Confirm the mouthpiece is securely attached․ Finally, a dirty chamber can hinder performance, so regular cleaning is crucial for consistent vapor production․
Error Messages and Their Solutions
Encountering an error message? The PAX Plus utilizes codes to indicate issues․ A flashing blue light often signals a low battery, requiring immediate charging․ If the device displays a solid red light, it may indicate overheating; allow it to cool down․
For persistent errors, consult the PAX Mobile App’s troubleshooting section or the official PAX support website․ Resetting the device by holding the power button for ten seconds can often resolve minor software glitches․

PAX Plus Safety and Maintenance
Prioritize safety and longevity! Regular cleaning, proper battery care, and adherence to safety precautions ensure optimal performance and a lasting PAX Plus experience․
Cleaning Procedures: Chamber and Device
Maintaining cleanliness is crucial for optimal vapor quality and device longevity․ Regularly empty the chamber after each use, utilizing the included PAX brush to remove any remaining material․ For a deeper clean, isopropyl alcohol and cotton swabs are recommended, ensuring complete dryness before reassembly․
The mouthpiece should also be cleaned frequently with a swab․ Avoid submerging the device in liquids․ Pay attention to the oven lid and airflow pathways, ensuring they are free from obstructions․ Consistent cleaning prevents buildup and preserves the PAX Plus’s performance․
Battery Care and Longevity
Proper battery care maximizes the lifespan of your PAX Plus․ Avoid extreme temperatures, as both heat and cold can degrade battery performance․ Utilize the provided charging cable and avoid overnight charging, disconnecting once fully charged․
Store the device in a cool, dry place when not in use․ While the PAX Plus features robust battery technology, consistent adherence to these guidelines will ensure years of reliable operation․ Avoid using third-party chargers, as they may damage the battery․
Safety Precautions and Warnings
Always exercise caution when using the PAX Plus․ Keep the device away from flammable materials and liquids․ Do not disassemble or attempt to repair the device yourself; contact PAX support for assistance․
Ensure the device is used in a well-ventilated area․ This device is intended for adult use only and should be kept out of reach of children and pets․ Misuse may result in injury or damage․ Follow all local laws and regulations regarding cannabis use․
PAX Plus vs․ Other PAX Models
Explore the PAX ecosystem! This section compares the PAX Plus to the Mini and Era, helping you determine which device best suits your individual preferences․
PAX Plus vs․ PAX Mini: A Comparison
The PAX Plus and PAX Mini both offer discreet vaporizing experiences, but differ in key areas․ The Plus boasts a larger oven capacity, ideal for group sessions, while the Mini is ultra-portable and streamlined for solo use․
The Plus features a more advanced heating system and customizable temperature settings, providing greater control over vapor quality․ The Mini offers simpler operation with fewer customization options․ Both devices are flower-first innovations, but the Plus expands functionality with concentrate compatibility via a separate pod․
PAX Plus vs․ PAX Era: Understanding the Differences
The PAX Plus and PAX Era represent distinct approaches to cannabis consumption․ The Plus is a versatile device compatible with both dry herb and concentrates (with a pod), offering flexibility in material choice․ The Era, however, is exclusively designed for use with PAX Era oil pods, providing a streamlined, mess-free experience․
The Plus prioritizes user control with adjustable temperature settings and packing options, while the Era emphasizes simplicity and convenience․ The Era’s pod system ensures consistent dosing and eliminates the need for grinding․
Choosing the Right PAX Device for Your Needs
Selecting the ideal PAX device hinges on your consumption preferences․ If you enjoy the ritual of grinding and packing dry herb, and appreciate temperature control, the PAX Plus is an excellent choice․ Its versatility extends to concentrates with a separate pod․
However, if convenience and discretion are paramount, and you prefer pre-filled oil pods, the PAX Era offers a seamless experience․ Consider your lifestyle and desired level of customization when making your decision․

PAX PINPAD SP30: Setup and Usage
This guide details the PAX SP30 PINPAD installation, usage tips, and password security measures for models SP30RF21 and V5PSP30RF21, ensuring secure transactions․
Installing the PAX SP30 PINPAD
Proper installation of the PAX SP30 PINPAD is crucial for seamless operation․ Begin by physically connecting the PINPAD to your PAX device, ensuring a secure connection․ Next, power on both devices and follow the on-screen prompts for initial setup․ Verify the PINPAD is recognized by the main terminal․
Carefully review the included documentation for specific model instructions․ Pay close attention to any software updates required during the installation process․ A stable network connection is essential for successful activation and ongoing functionality․ Confirm all cables are correctly positioned to avoid connectivity issues․
SP30 Password Security Measures
Protecting your PAX SP30 PINPAD with robust password security is paramount․ Implement strong, unique passwords that combine uppercase and lowercase letters, numbers, and symbols․ Regularly change your passwords – at least every 90 days – to mitigate potential risks․
Enable multi-factor authentication whenever possible for an added layer of security․ Restrict access to authorized personnel only and educate staff on password best practices․ Avoid using easily guessable information, such as birthdays or common words․ Regularly audit user accounts and permissions․
SP30RF21 and V5PSP30RF21 Models
The PAX SP30RF21 and V5PSP30RF21 represent key iterations of the SP30 PINPAD series․ Both models offer enhanced security features and reliable performance for payment processing․ The V5PSP30RF21 incorporates updated firmware and potentially improved contactless capabilities compared to the SP30RF21․
Ensure compatibility with your payment system before deployment․ Installation procedures remain largely consistent between the two, but firmware updates may differ․ Refer to the specific model’s documentation for detailed instructions and optimal configuration settings․
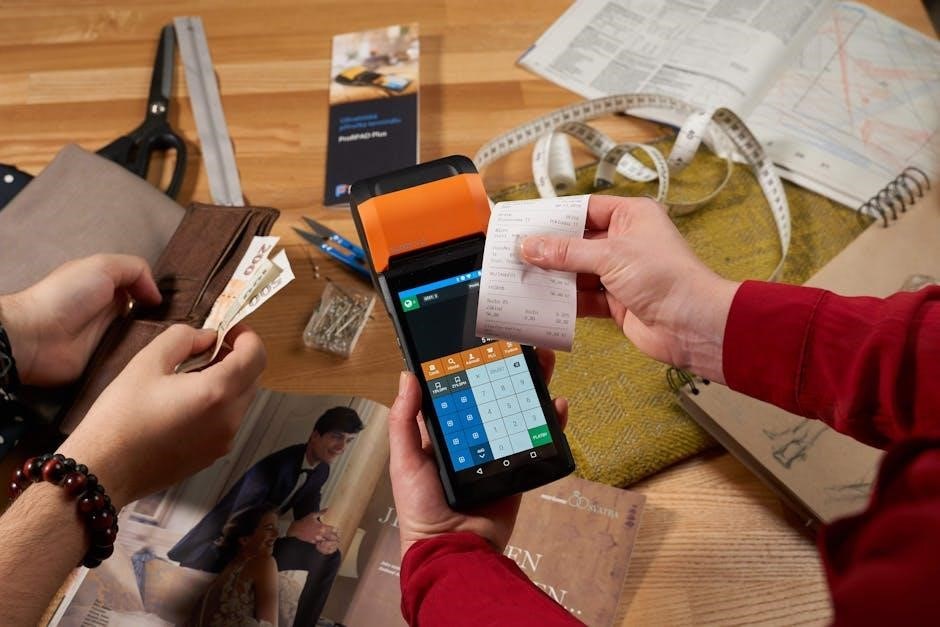
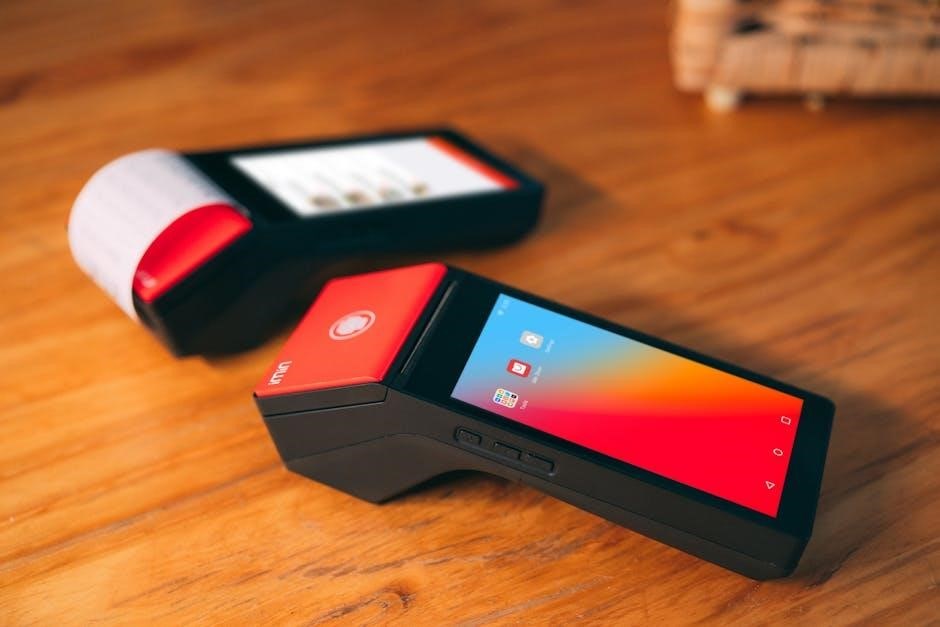
PAX A930RTX: Smart Mobile Payment Terminal
The A930RTX is a smart mobile payment solution․ This terminal offers detailed installation instructions, power management, contactless transactions, and secure card/receipt handling․
A930RTX Installation Instructions
Proper installation ensures optimal performance of the A930RTX․ Begin by carefully unpacking the device and verifying all components are present․ Connect the power adapter to a reliable power source and the terminal itself․ Ensure a stable connection before proceeding․ Download and install any necessary software or drivers as prompted․ Follow the on-screen instructions for initial setup, including network configuration and date/time settings․ Register the device with your payment processor to activate transaction capabilities․
Power Management and Contactless Transactions
Efficient power management extends the A930RTX’s usability․ Utilize the power-saving modes when the device is idle to conserve battery life․ Regularly check the battery level and recharge promptly to avoid interruptions․ The A930RTX supports contactless transactions via NFC technology․ Simply hold the card near the designated reader area․ Ensure a successful connection before completing the transaction․ Verify the transaction details on the screen before finalizing the payment process․
Chip Card and Paper Receipt Management
The A930RTX efficiently handles chip card transactions․ Insert the chip card into the designated slot, ensuring proper orientation․ Follow the on-screen prompts to complete the authentication process․ For paper receipts, the device offers customizable options, including printing or foregoing a physical copy․ Manage receipt settings through the terminal’s menu․ Regularly check paper supply levels and replace rolls as needed to maintain uninterrupted service․

PAX Q25: User Guide
This guide details the PAX Q25’s operation․ Learn about power connections, restarting, IC and contactless card readers, and utilizing the electronic signature functionality․
Q25 Power Connection and Restart
Ensuring proper power connection is crucial for reliable operation of the PAX Q25․ Connect the provided power adapter to a suitable power source and the Q25’s designated power port․ Verify a secure connection․ To restart the device, press and hold the power button until the screen goes blank, then release․ The Q25 will automatically power on, initiating the startup sequence․ If the device fails to restart, double-check the power connection and consult the troubleshooting section․
IC and Contactless Card Readers
The PAX Q25 features both IC and contactless card readers for versatile payment acceptance․ For IC cards, insert the chip-enabled card into the reader slot, ensuring the chip faces the correct direction․ For contactless payments, simply hold the card near the contactless symbol on the device․ The Q25 supports various contactless technologies, providing a quick and secure transaction experience․ Always ensure the card reader is clean and free from obstructions for optimal performance․
Electronic Signature Functionality
The PAX Q25 supports electronic signature capture, streamlining the payment process and reducing paper usage․ After a transaction is completed, the customer can sign directly on the device’s screen using the provided stylus․ This digital signature is securely stored with the transaction data, providing a verifiable record of authorization․ Ensure the screen is clean for optimal signature capture and review the signature before finalizing the transaction․

PAX D200/D200HS: Mobile Payment Terminal
This guide details the D200 and D200HS setup․ It provides step-by-step instructions for device configuration, card installation, and efficient battery charging procedures․
D200/D200HS Setup and Installation
Initial setup of the PAX D200/D200HS mobile payment terminal is straightforward․ Begin by ensuring the device is adequately charged using the provided power adapter․ Carefully insert a compatible SIM card, following the diagram located within the battery compartment․ Next, power on the terminal and follow the on-screen prompts to complete the initial configuration, including date and time settings․
Proper card installation is crucial for successful transactions․ Gently insert the EMV chip card into the card reader, ensuring the chip is facing the correct direction․ For magnetic stripe cards, swipe the card smoothly through the reader․ Always refer to the quick start guide for detailed illustrations and troubleshooting tips․
Card Installation and Battery Charging
Ensuring optimal battery performance is vital for uninterrupted operation of your PAX device․ Utilize the provided USB-C cable and power adapter to charge the battery fully before initial use․ Avoid overcharging, as it can reduce battery lifespan․ Regularly check the battery level via the device’s interface․
Correct card installation is essential for secure transactions․ Insert the SIM card carefully into the designated slot, ensuring proper alignment․ For contactless payments, simply hold the card near the NFC reader․ Always handle cards with care to prevent damage to the magnetic stripe or chip․